
SAP CCO Peak Mobile GuideHow to use SAP Customer Checkout on Android
In this guide, you'll learn how to install SAP Customer Checkout on an Android device and how to use your own CCO Instance on that device. The goal is to run your already existing SAP Customer Checkout instance, with our solution Peak Mobile - directly on Android.
Setup
1. Download the Peak Mobile App on your local device
The download link is displayed below. If you have not yet received a password, please contact your Checkout Peak consultant or reach out to info@checkout-peak.com
Download: CCO-Peak APK
Install the APK on your local Android device.
2. Prepare your existing SAP CCO Instance
On your PC start SAP Customer Checkout like you normally would.
-
- Backup Path:
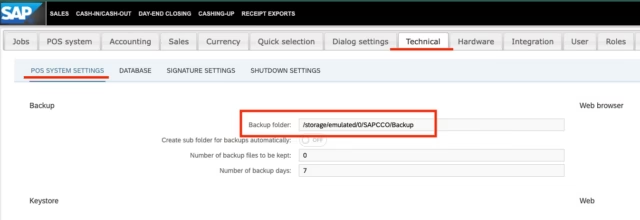
Go to Configuration -> Technical -> POS System Settings.
Remove the current path for Backup Folder and replace it with a valid path which is accessible from your android device, for example:
/storage/emulated/0/SAPCCO/Backup
Set Backup Path - Deactivate Show cursor for input:
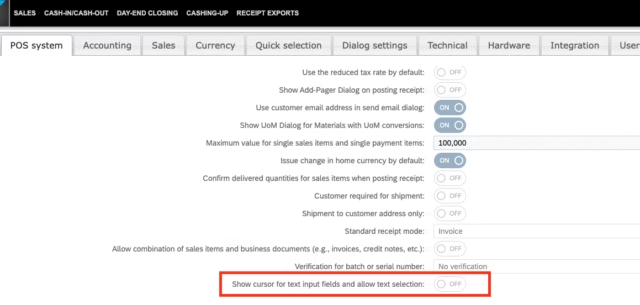
Go to Configuration => Pos System => Sales Screen.
Deactivate Show cursor for text input fields and allow text selection
Deactivate Show cursor for input - Important: The PORT of your local POS should be 9999
- To change the port go to Configuration => Technical => POS SYSTEM SETTINGS and configure the POS port under the Web section
- Backup Path:
3. Copy SAPCCO from Windows to Android
Shutdown SAP Customer Checkout. Locate your current SAP Customer Checkout Directory on Windows. Rename the directory to „SAPCCO„.
Connect your Android device via USB and navigate to Internal storage. Copy the „SAPCCO“ folder to that directory.
Result should look like this:

Note: In the latest version of Peak Mobile, you can alternatively use the built-in download manager. It automatically handles downloading, extracting, and moving the directory for you.
For example, you can upload the SAP CCO folder to Microsoft SharePoint and then retrieve it directly in Peak Mobile by entering the URL or scanning a QR code
4. Add License Key
Open the SAPCCO folder on your Android device and add the license.txt file that was provided by our team. Important: Without a license key the application will only be running for 30 days.
Now you can disconnect your android device from the PC.
5. Start Peak Mobile
Start the Peak Mobile App on your android device and follow the installation instructions on the screen. Make sure to allow all requested permission when prompted.
During the installation, you will see how SAP CCO starting in the terminal. This terminal window appears only once. If the startup runs without any issues, you can click on “Installation completed” at the top. After about 1–2 minutes, you will be automatically redirected to the SAP CCO start page.
Installation is completed!
Best Practice
How to Shut Down Your POS?
Important: Always use the designated shutdown option to prevent database corruption.
Android may terminate the application when it is not actively in use, which can result in data inconsistencies or database damage. Therefore, it is essential to follow the shutdown procedure described below.
1. Finish the checkout process and logout
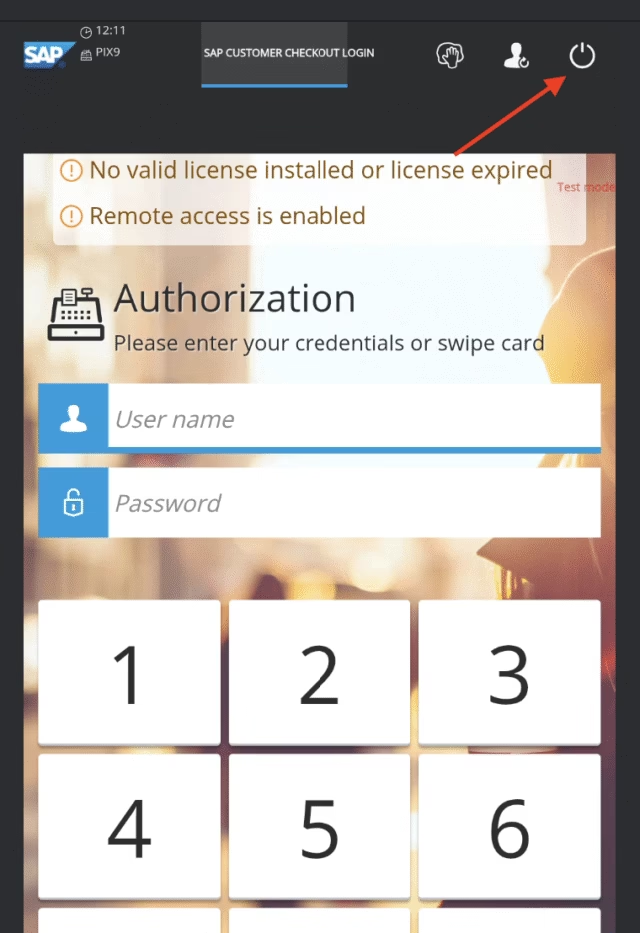
2. Shut down the application using the Shutdown button
Always exit the application properly by clicking the “Shutdown” button located in the top-right corner of the POS application.
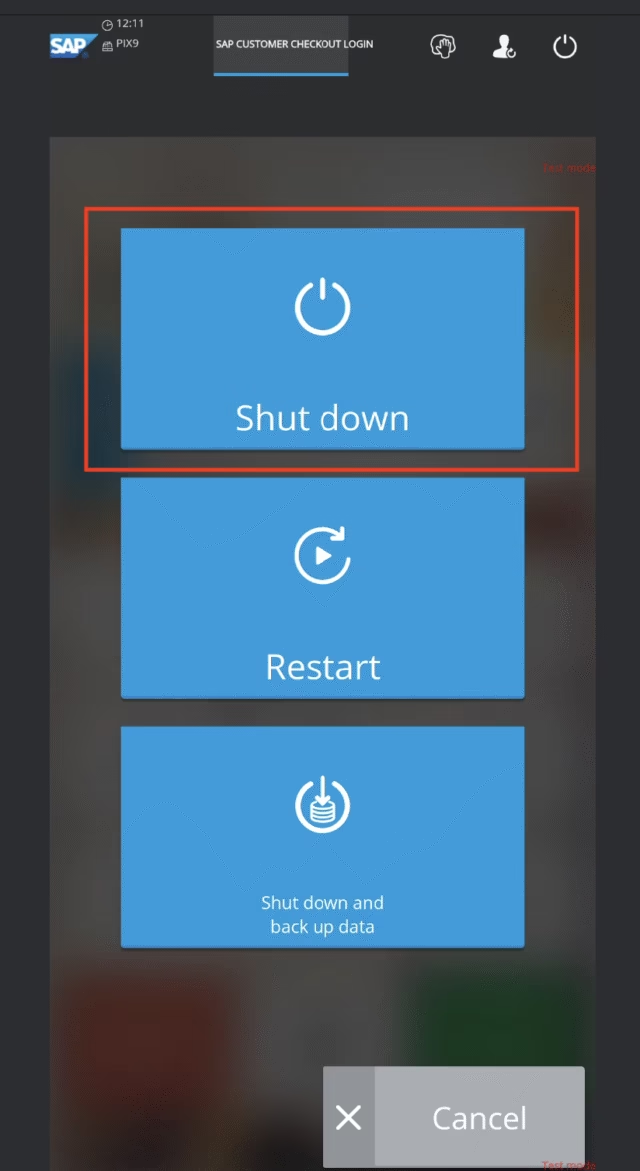
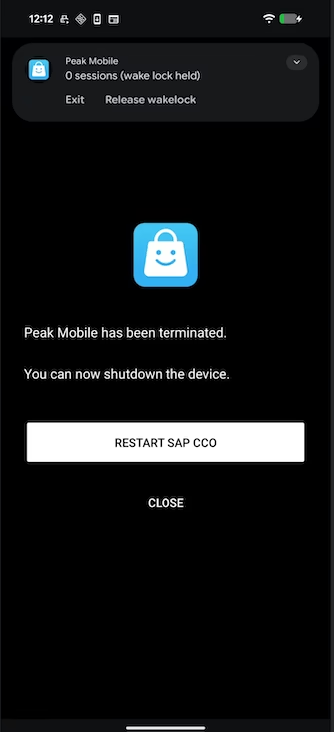
3. Wait for the database shutdown
During this process, the database is shut down in a controlled manner.
After the shutdown process is complete, a separate screen will appear, clearly indicating that the device can now be safely powered off.
Availability
Note: This Feature is only available after version 2026.19
Need Help or more Information?
Are you interested in printing via an IP printer or a Bluetooth printer? Would you like to display a digital receipt on the screen? Do you need barcode scanning or want to accept payments via Tap to Pay?
Feel free to reach out to us - we have already successfully implemented all of these solutions and would be happy to support you.
Our Team is always ready to support you with any question regarding Peak Mobile.
Reach out to: info@checkout-peak.com
Feel free to reach out to us - we have already successfully implemented all of these solutions and would be happy to support you.
Our Team is always ready to support you with any question regarding Peak Mobile.
Reach out to: info@checkout-peak.com
You want to see a Live Demo?
Book here
© 2026 Checkout-Peak
All rights reserved
